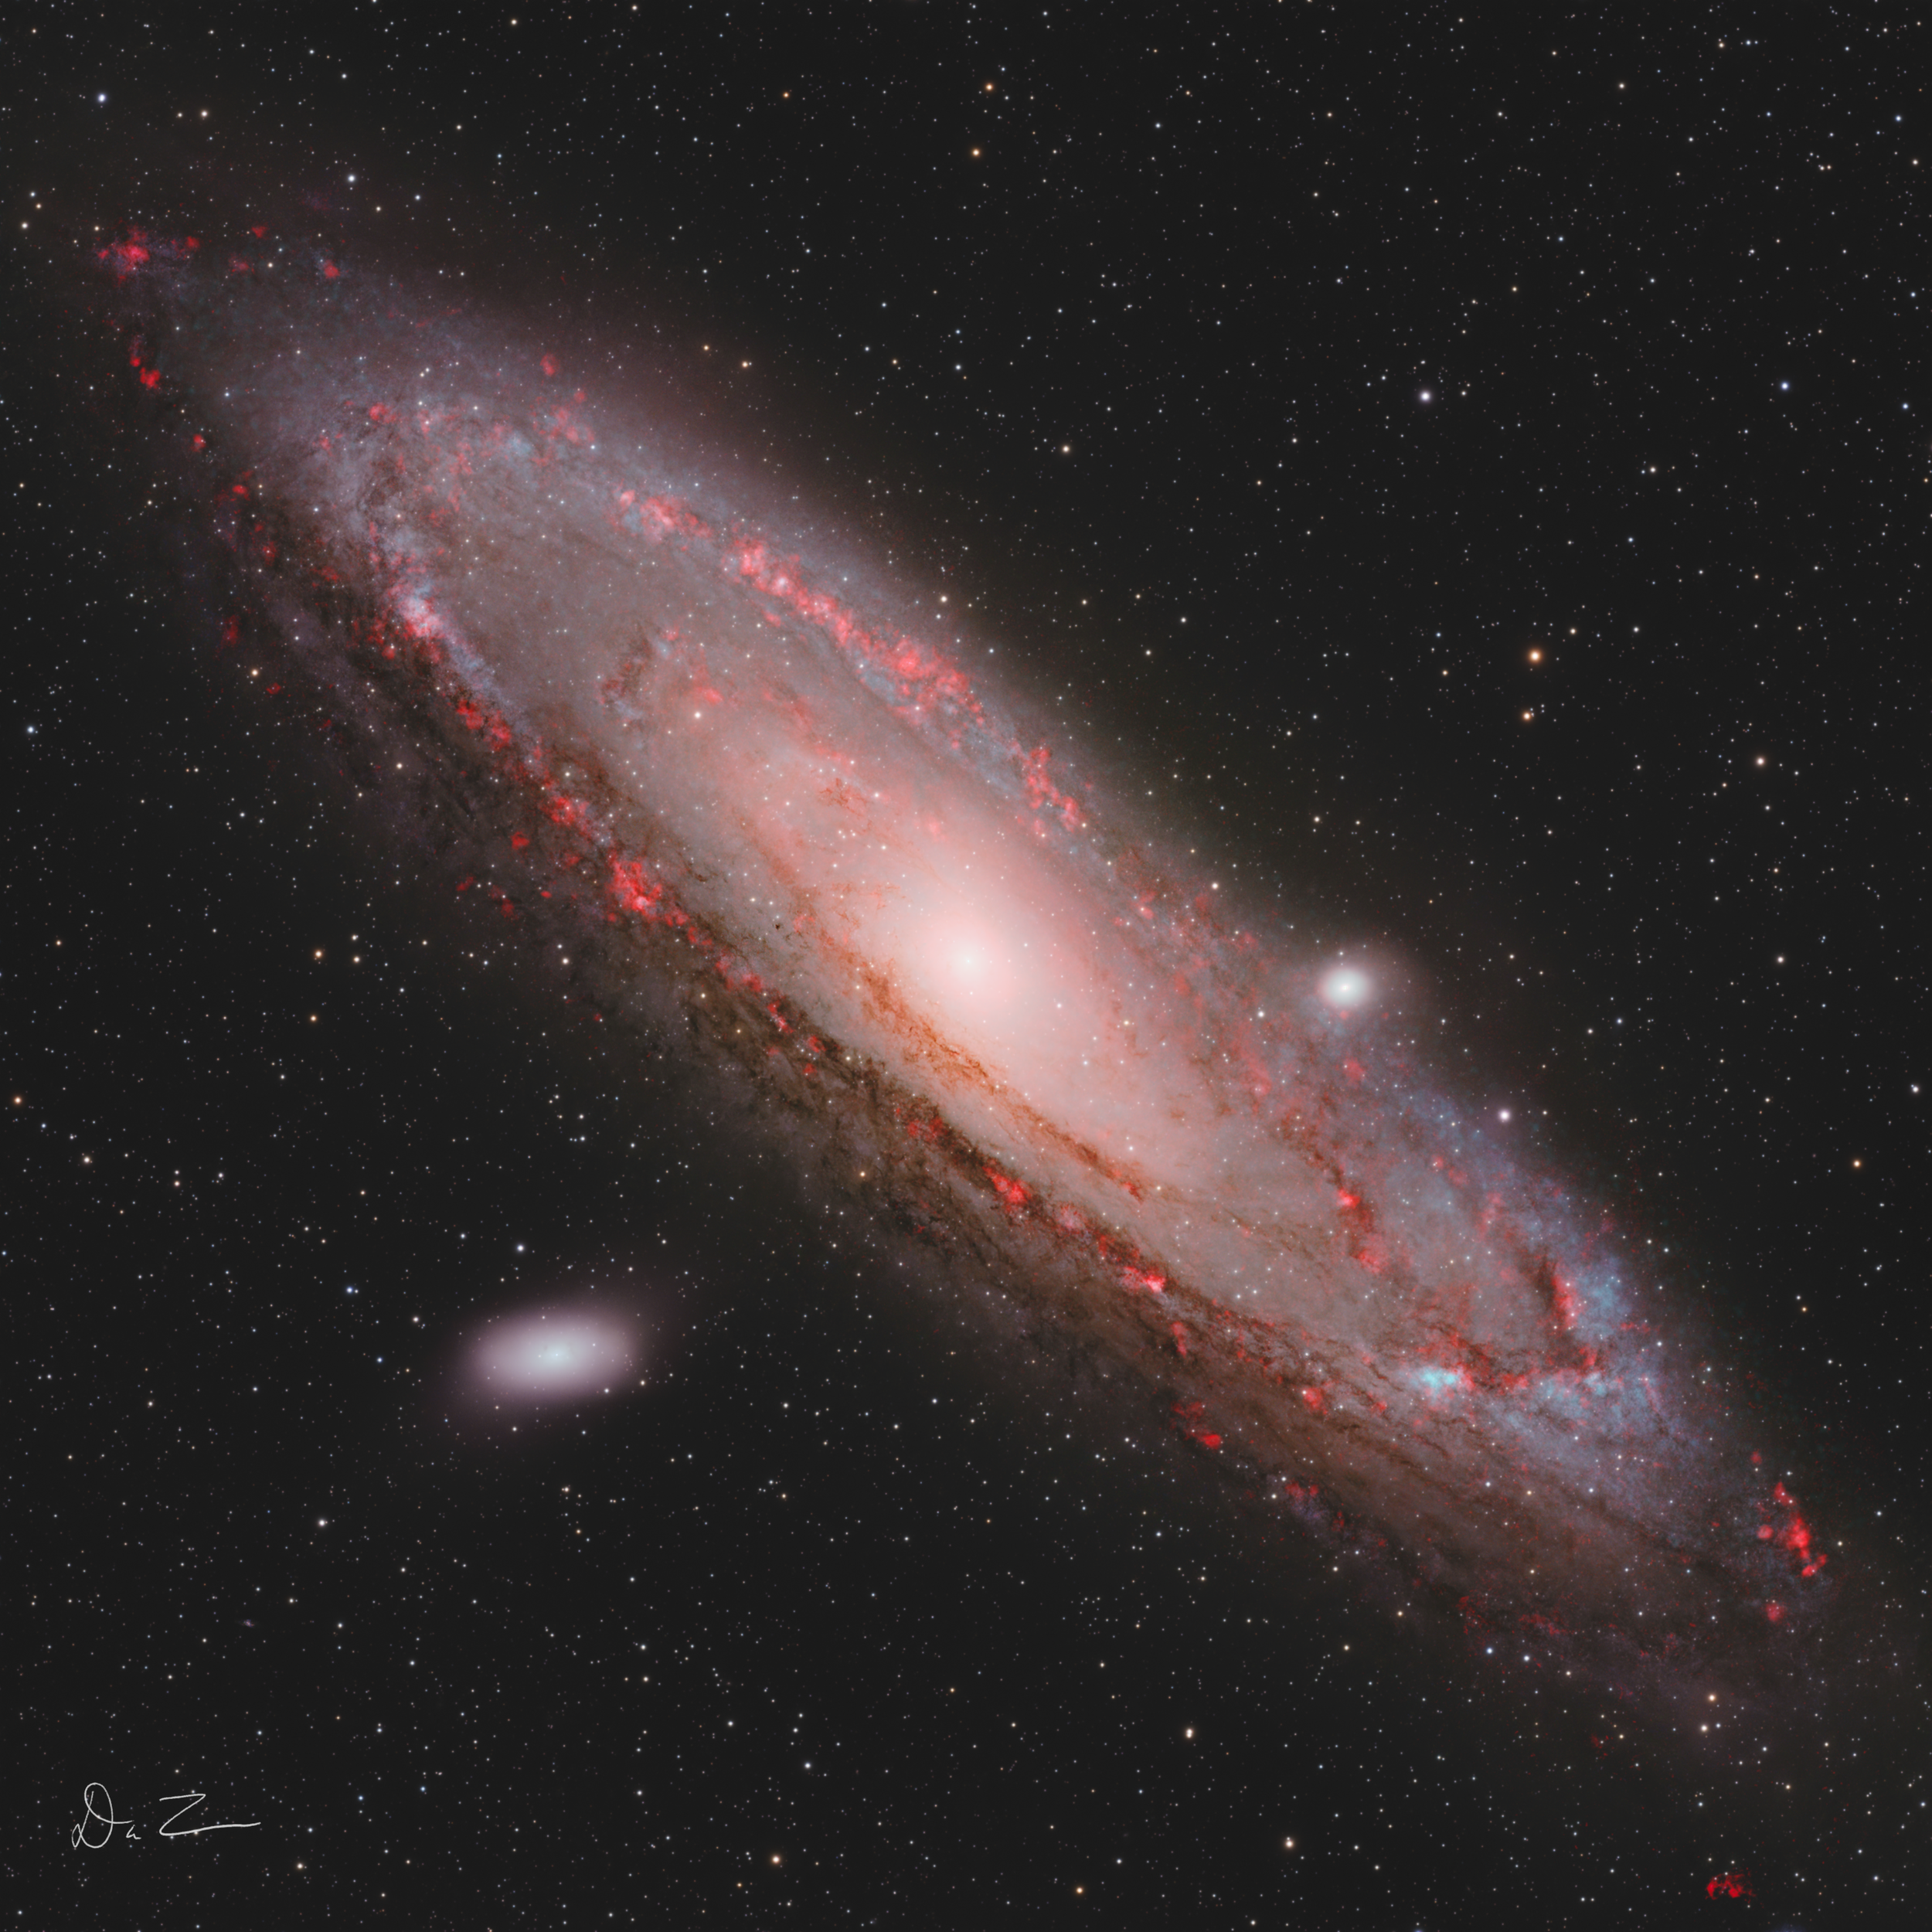
M31 - Andromeda Galaxy
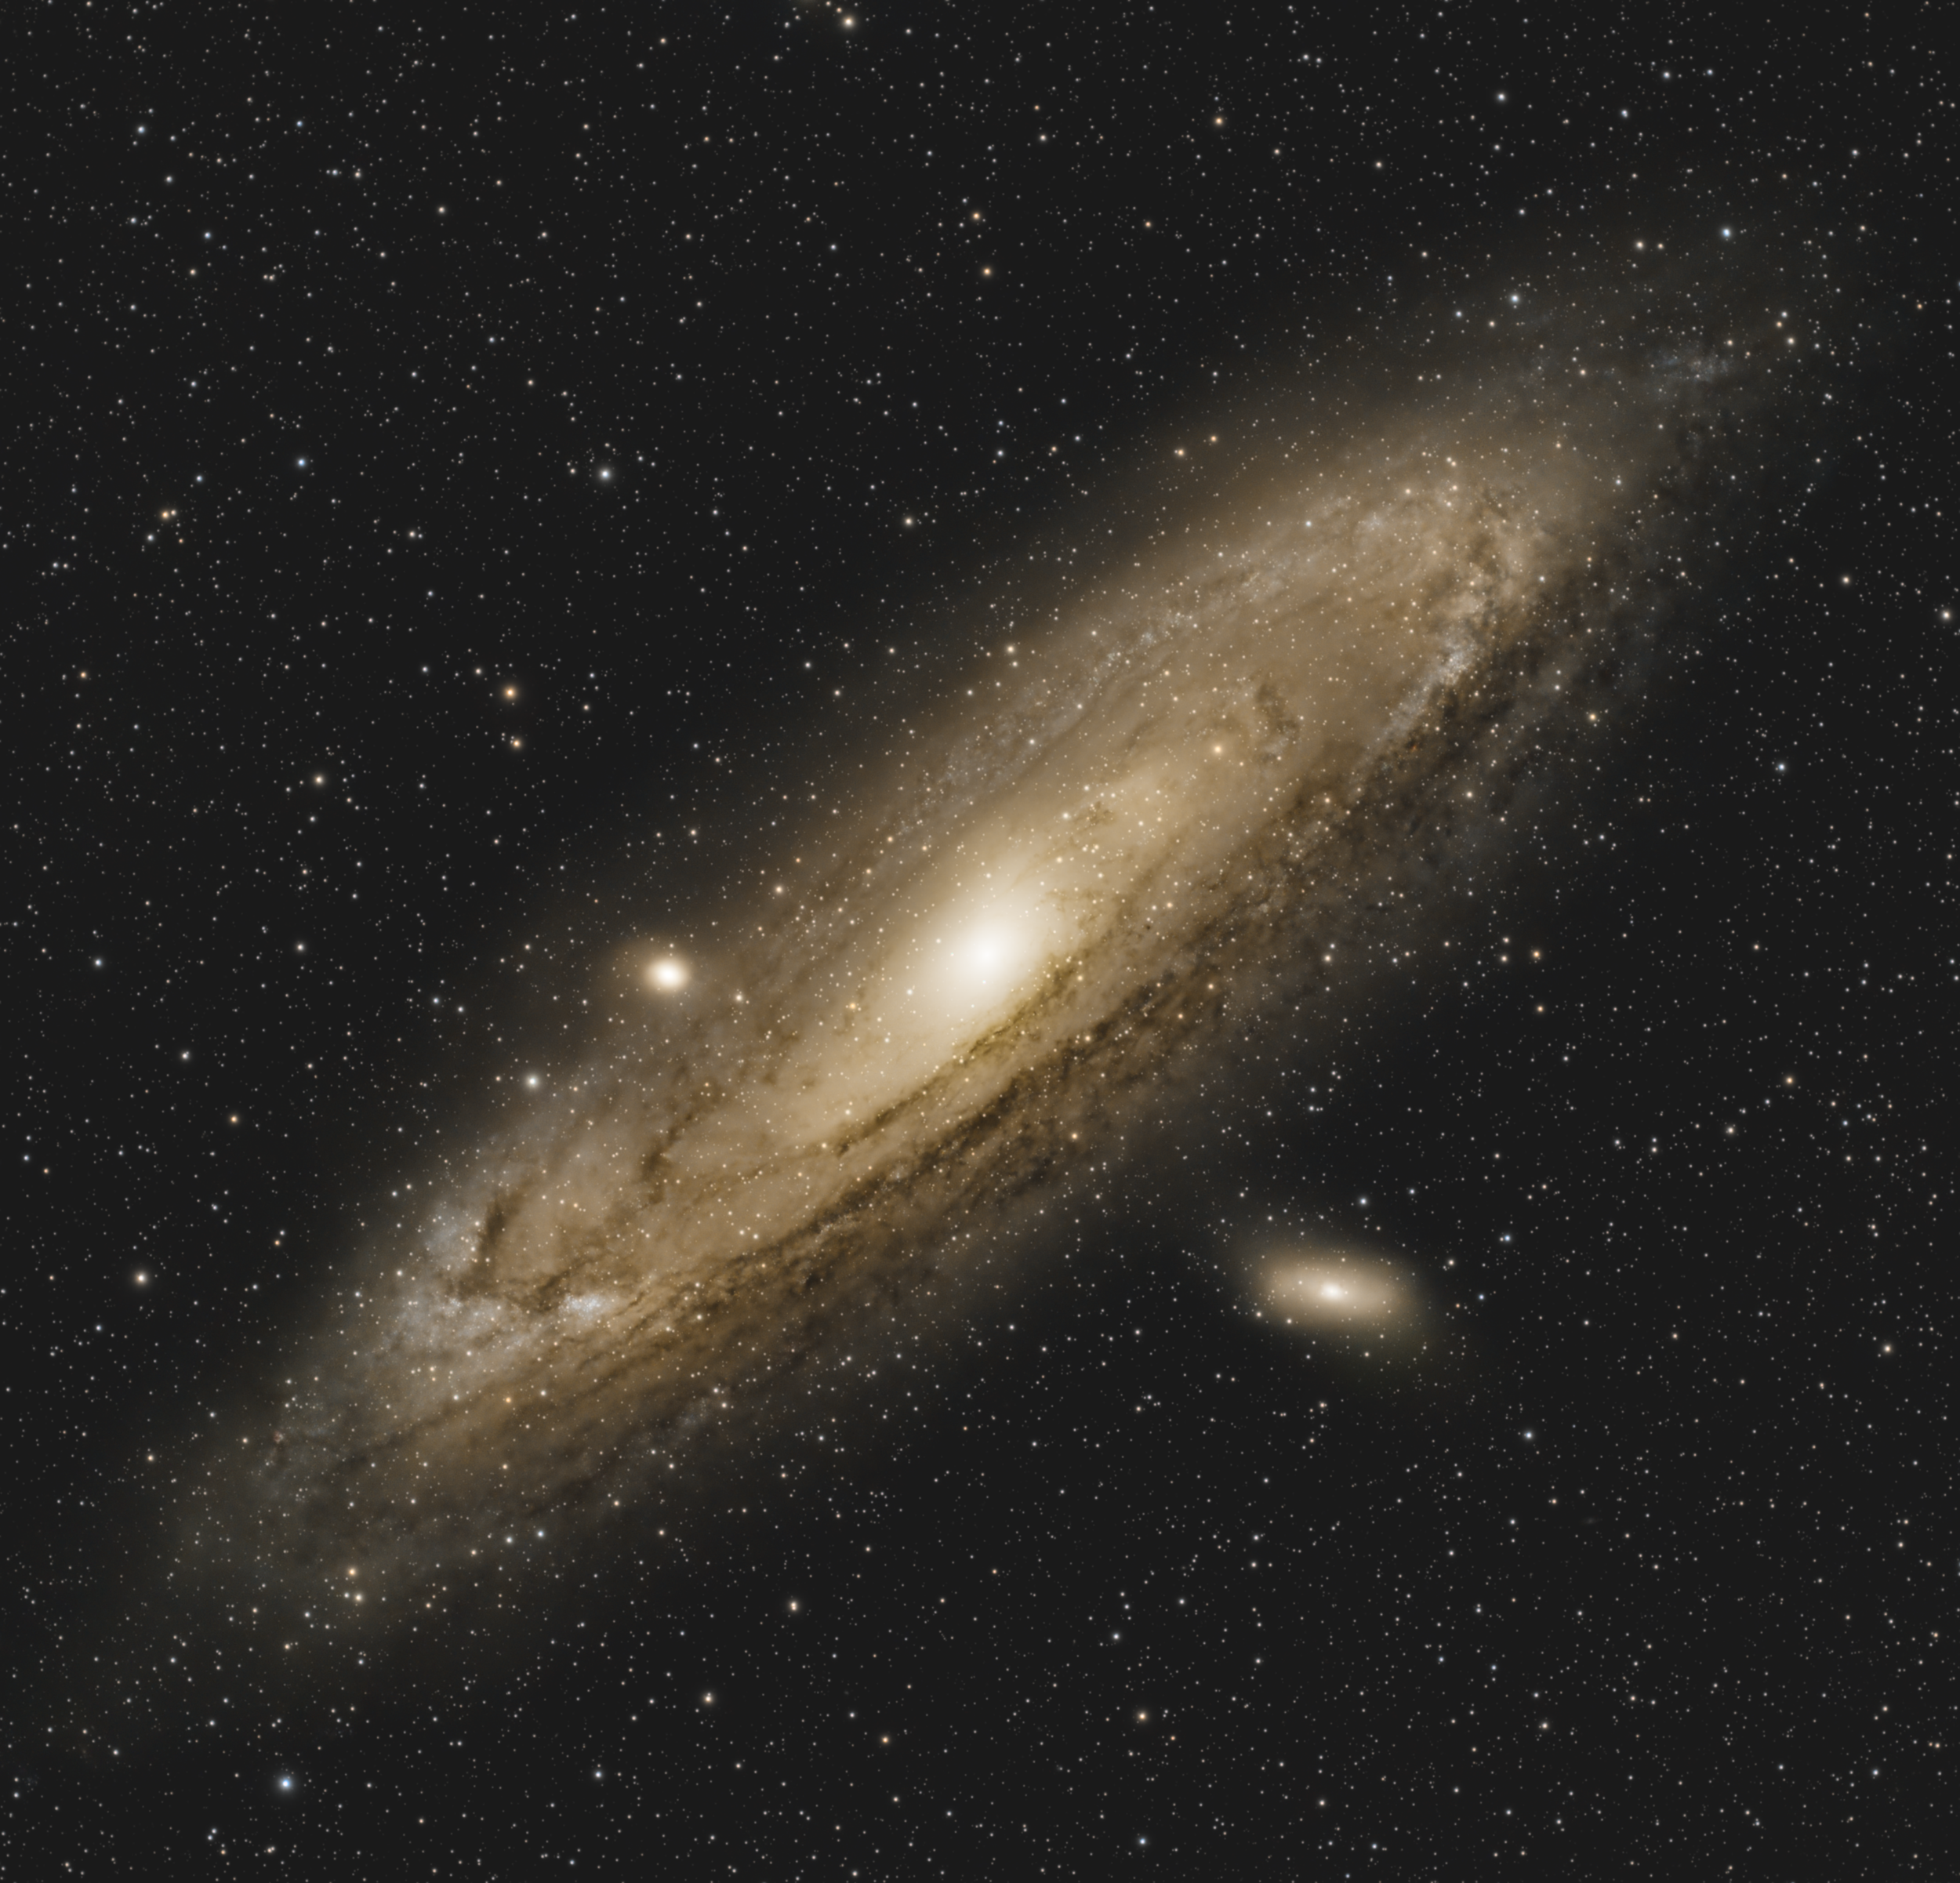
About 2.5 million light-years away in the Andromeda Constellation lies our nearest galactic neighbor, M31, which has an apparent magnitude of 3.1, which means the galaxy can be seen with the naked eye, even in areas with moderate light pollution. Andromeda is thought to contain approximately 1 trillion stars.
October 5, 2026
After a summer-long hiatus, I’m back to imaging - with some first lights! We’ve had maybe a half dozen clear nights since May, and I’m pretty sure I was traveling for all of them. Otherwise, the weather either been too windy, exceptionally smoky, cloudy (occasionally rainy), or some combination of those. In the meantime, I was fairly certain that I had forgotten how to do all of this, however, the break was also somewhat welcome. I spent the time planning and eventually making some equipment changes. I decided that I wanted to run two setups to maximize integration time. In that same vein, I wanted both setups to have data that would pair well - with a similar FOV and pixel scale.
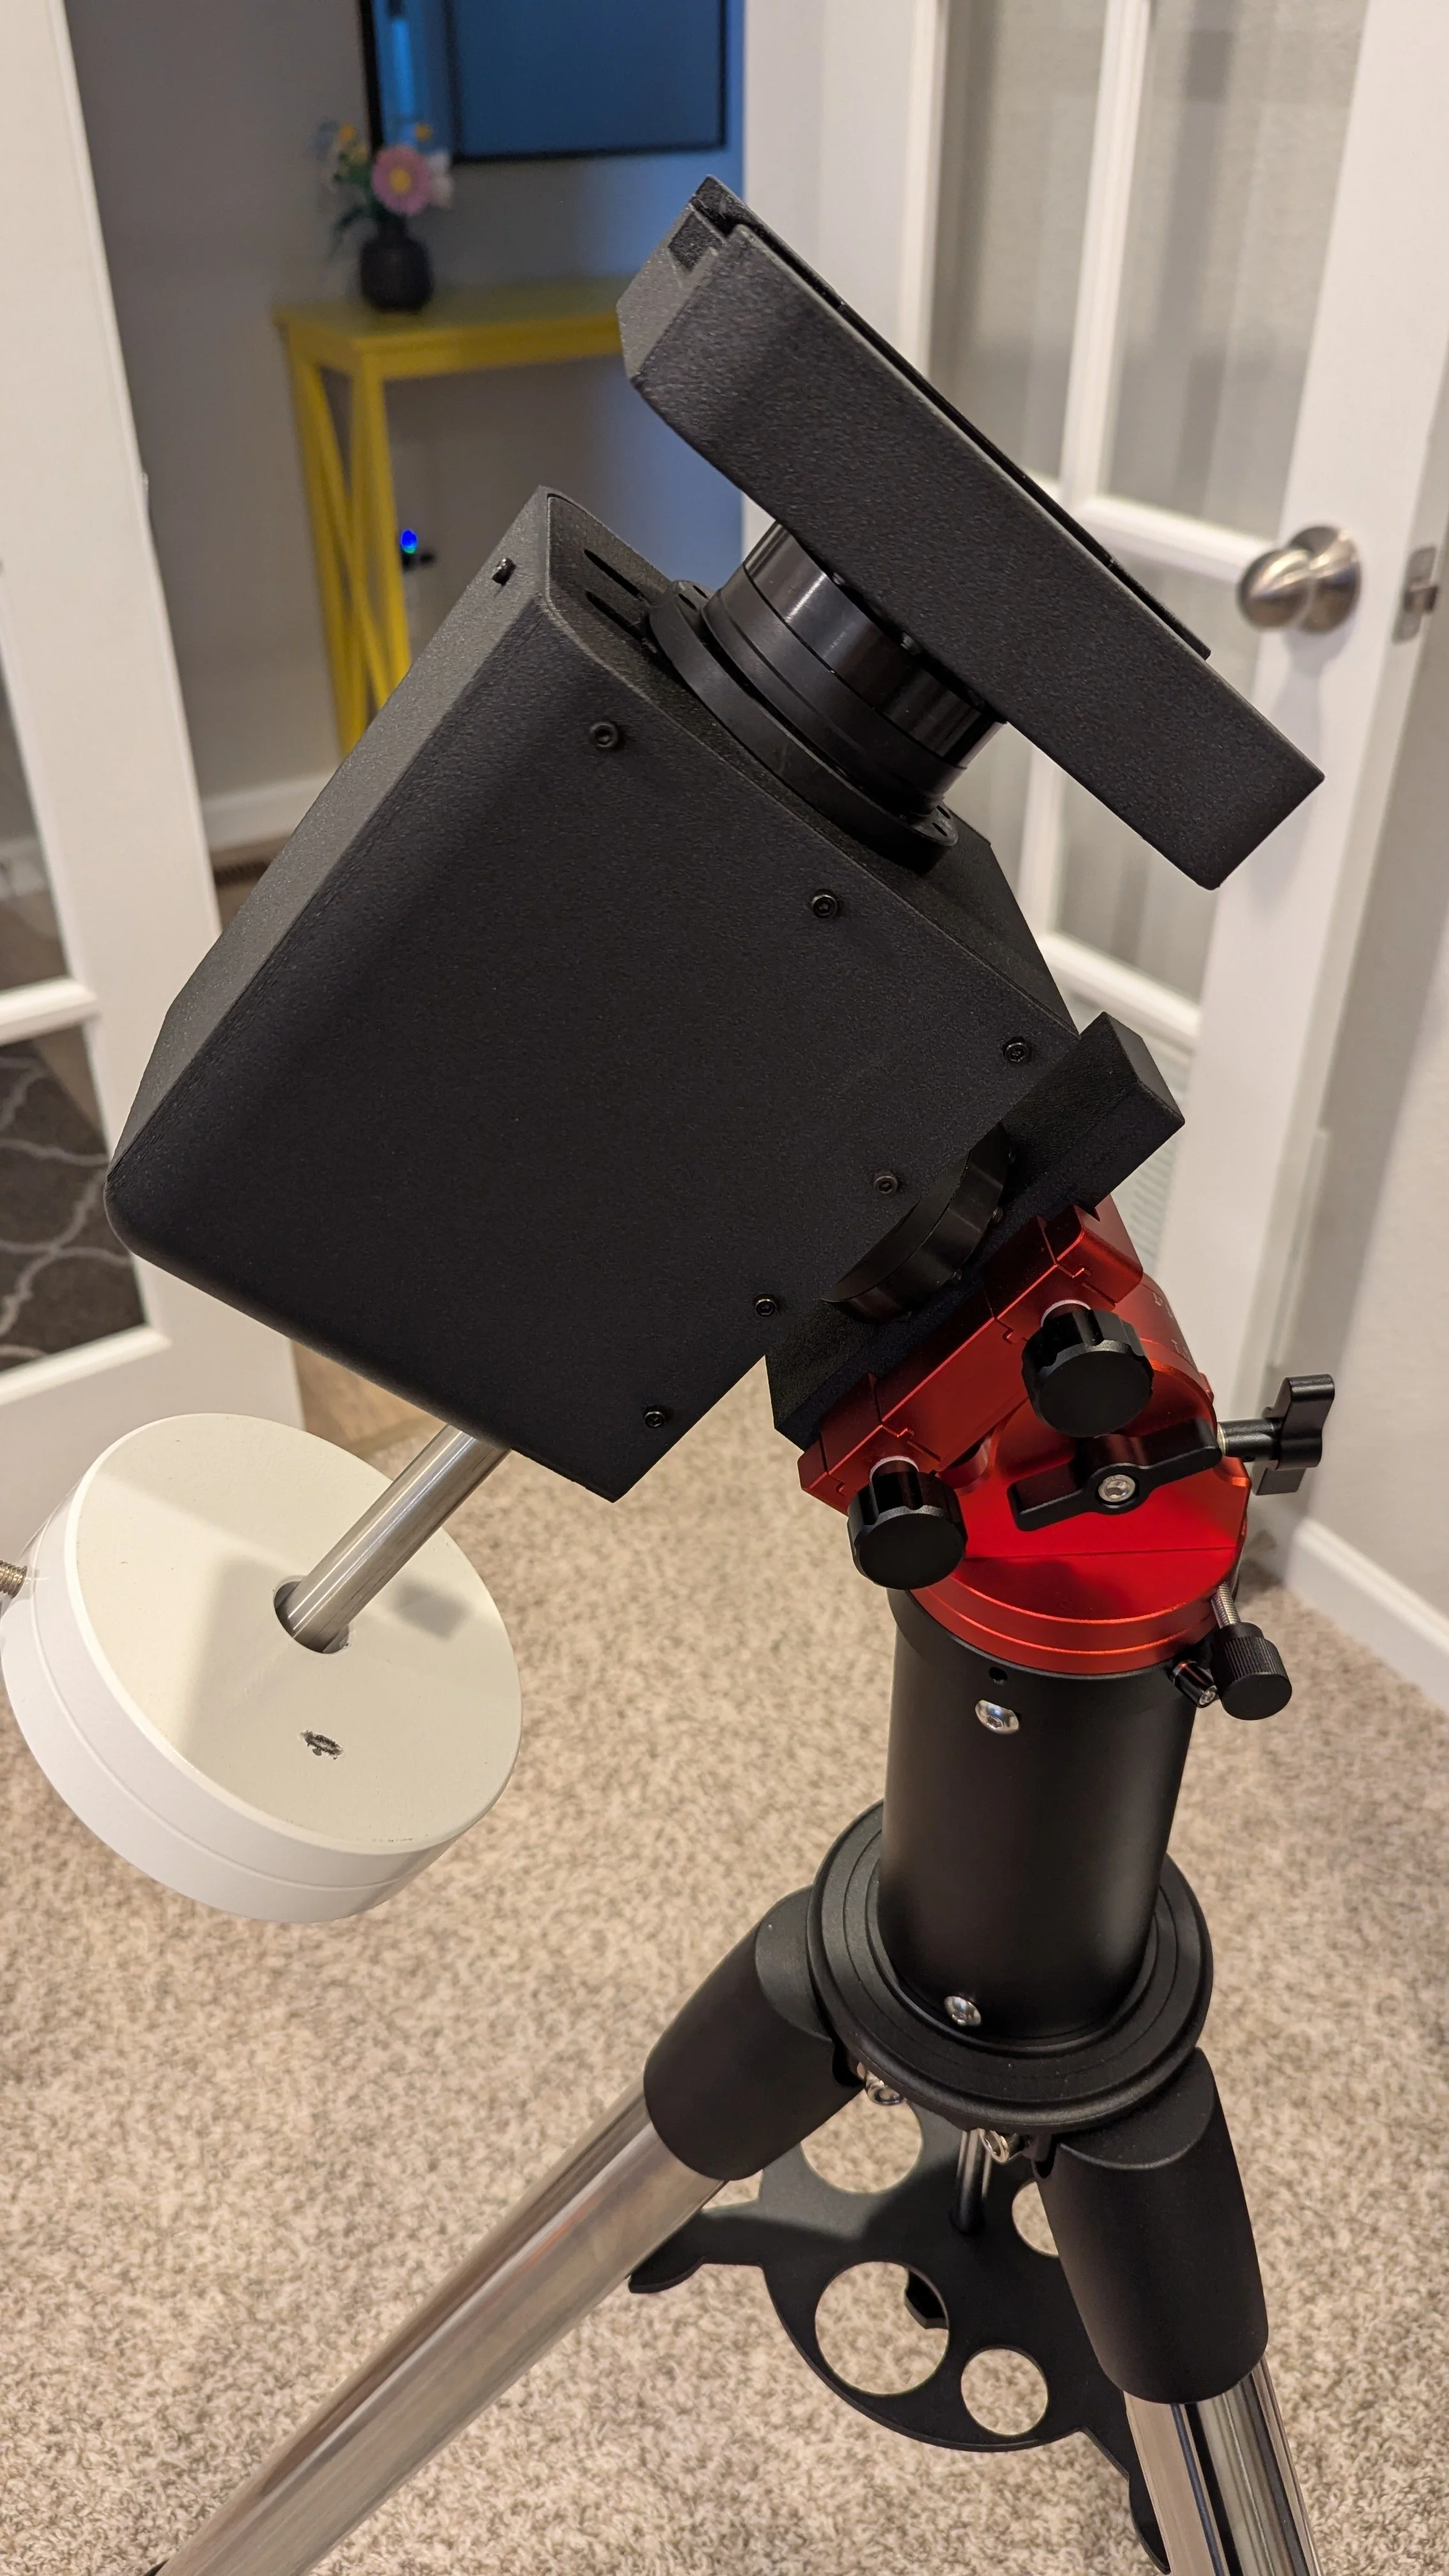
For wide field imaging, I ended up acquiring a Celestron C6, Hyperstar, and a ZWO 533MM Pro with Astronomik 12nm Ha, Oiii, and Sii MaxFR filters that were engineered for maximum signal transmission with the f/1.9 optics of the Hyperstar. This 300mm FL setup would run on my trusty Eq6r-Pro mount. Alongside this, I am running the William Optics Redcat 51 II with the ASI533MC Pro and the L3 filter, and I would run this smaller setup at 250mm FL on a DIY 3d Printed Harmonic Mount that I built. The plan is to use the one-shot color 533MC Pro at gain 0, utilizing the full well depth to not blow out stars and produce an RGB image, and the C6 to capture narrowband data. This image of Andromeda is first light for the C6 and 533MM setup, as well as the first full test of the 3d printed harmonic mount. The plan was to shoot 60” OSC subs, and 180” mono subs. I chose shorter OSC subs to try to control star size and not blow out their cores so I could maximize color in processing. The DIY harmonic mount project was really fun and I highly recommend it if you are into DIY projects and have a 3d printer (you could also outsource the printing if necessary.) Big credit to Zach Snow for the engineering and design on the mount (and also being willing to help me out when I got stuck!) He’s run his Edge HD 8 on it, and I’ve tried my EDT115 on it. The mount can handle a good payload!
Technical Details
Imaging Telescope: William Optics RedCat 51 II, Celestron C6 XLT SCT
Imaging Camera: ZWO ASI533MC Pro, ZWO ASI533MM Pro
Mount: Sky-Watcher EQ6-R Pro, DIY 3d Printed Harmonic Mount
Filter: Astronomik L-3 Luminance UV/IR Block 2", Astronomik MaxFR 12nm Ha 1.25”, Astronomik MaxFR 12nm Oiii 1.25”
Accessories: ZWO ASIAIR Plus, ZWO EAF, Antlia OAG and Filter Drawer Assembly, Starizona Filter Drawer 2", Starizona HyperStar 6 v4
Software: StarNet, PixInsight, BlurXTerminator, NoiseXTerminator, SetiAstro Statistical Stretch, SetiAstro Star Stretch, Siril, ZWO ASIAIR
Guiding Telescope: William Optics UniGuide 32
Guiding Camera: ZWO ASI174MM, ZWO ASI220MM
Imaging Dates: October 1, 3, and 4, 2026
Integration Time: 27h40m
(gain 0, f/4.9, -10c, L3): 520×60” (8h40m), 70×180” (3h30m)
(gain 101, f/1.9, -10c, Ha): 190×180” (9h30m)
(gain 101, f/1.9, -10c, Oiii): 120x180” (6h)
Darks/Flats/Dark Flats: 30/30/30
Bortle Dark-Sky Scale: 6.00
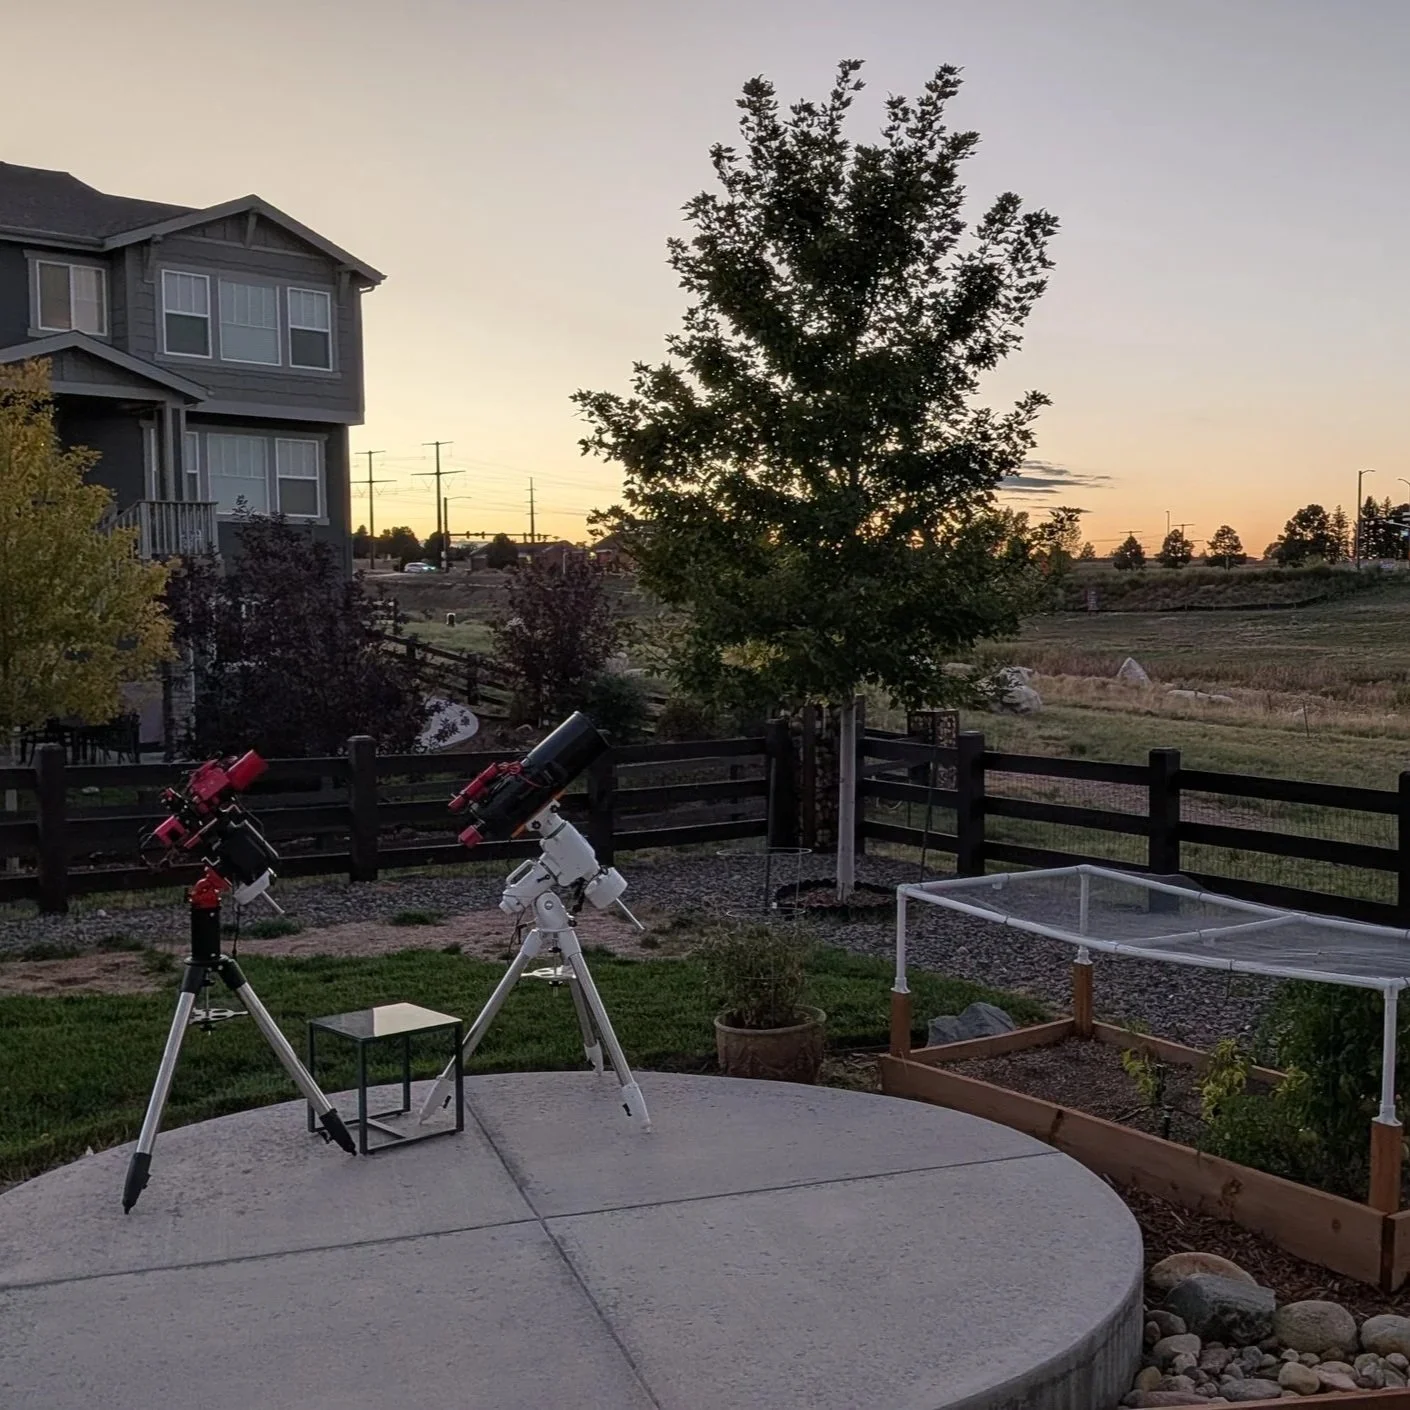
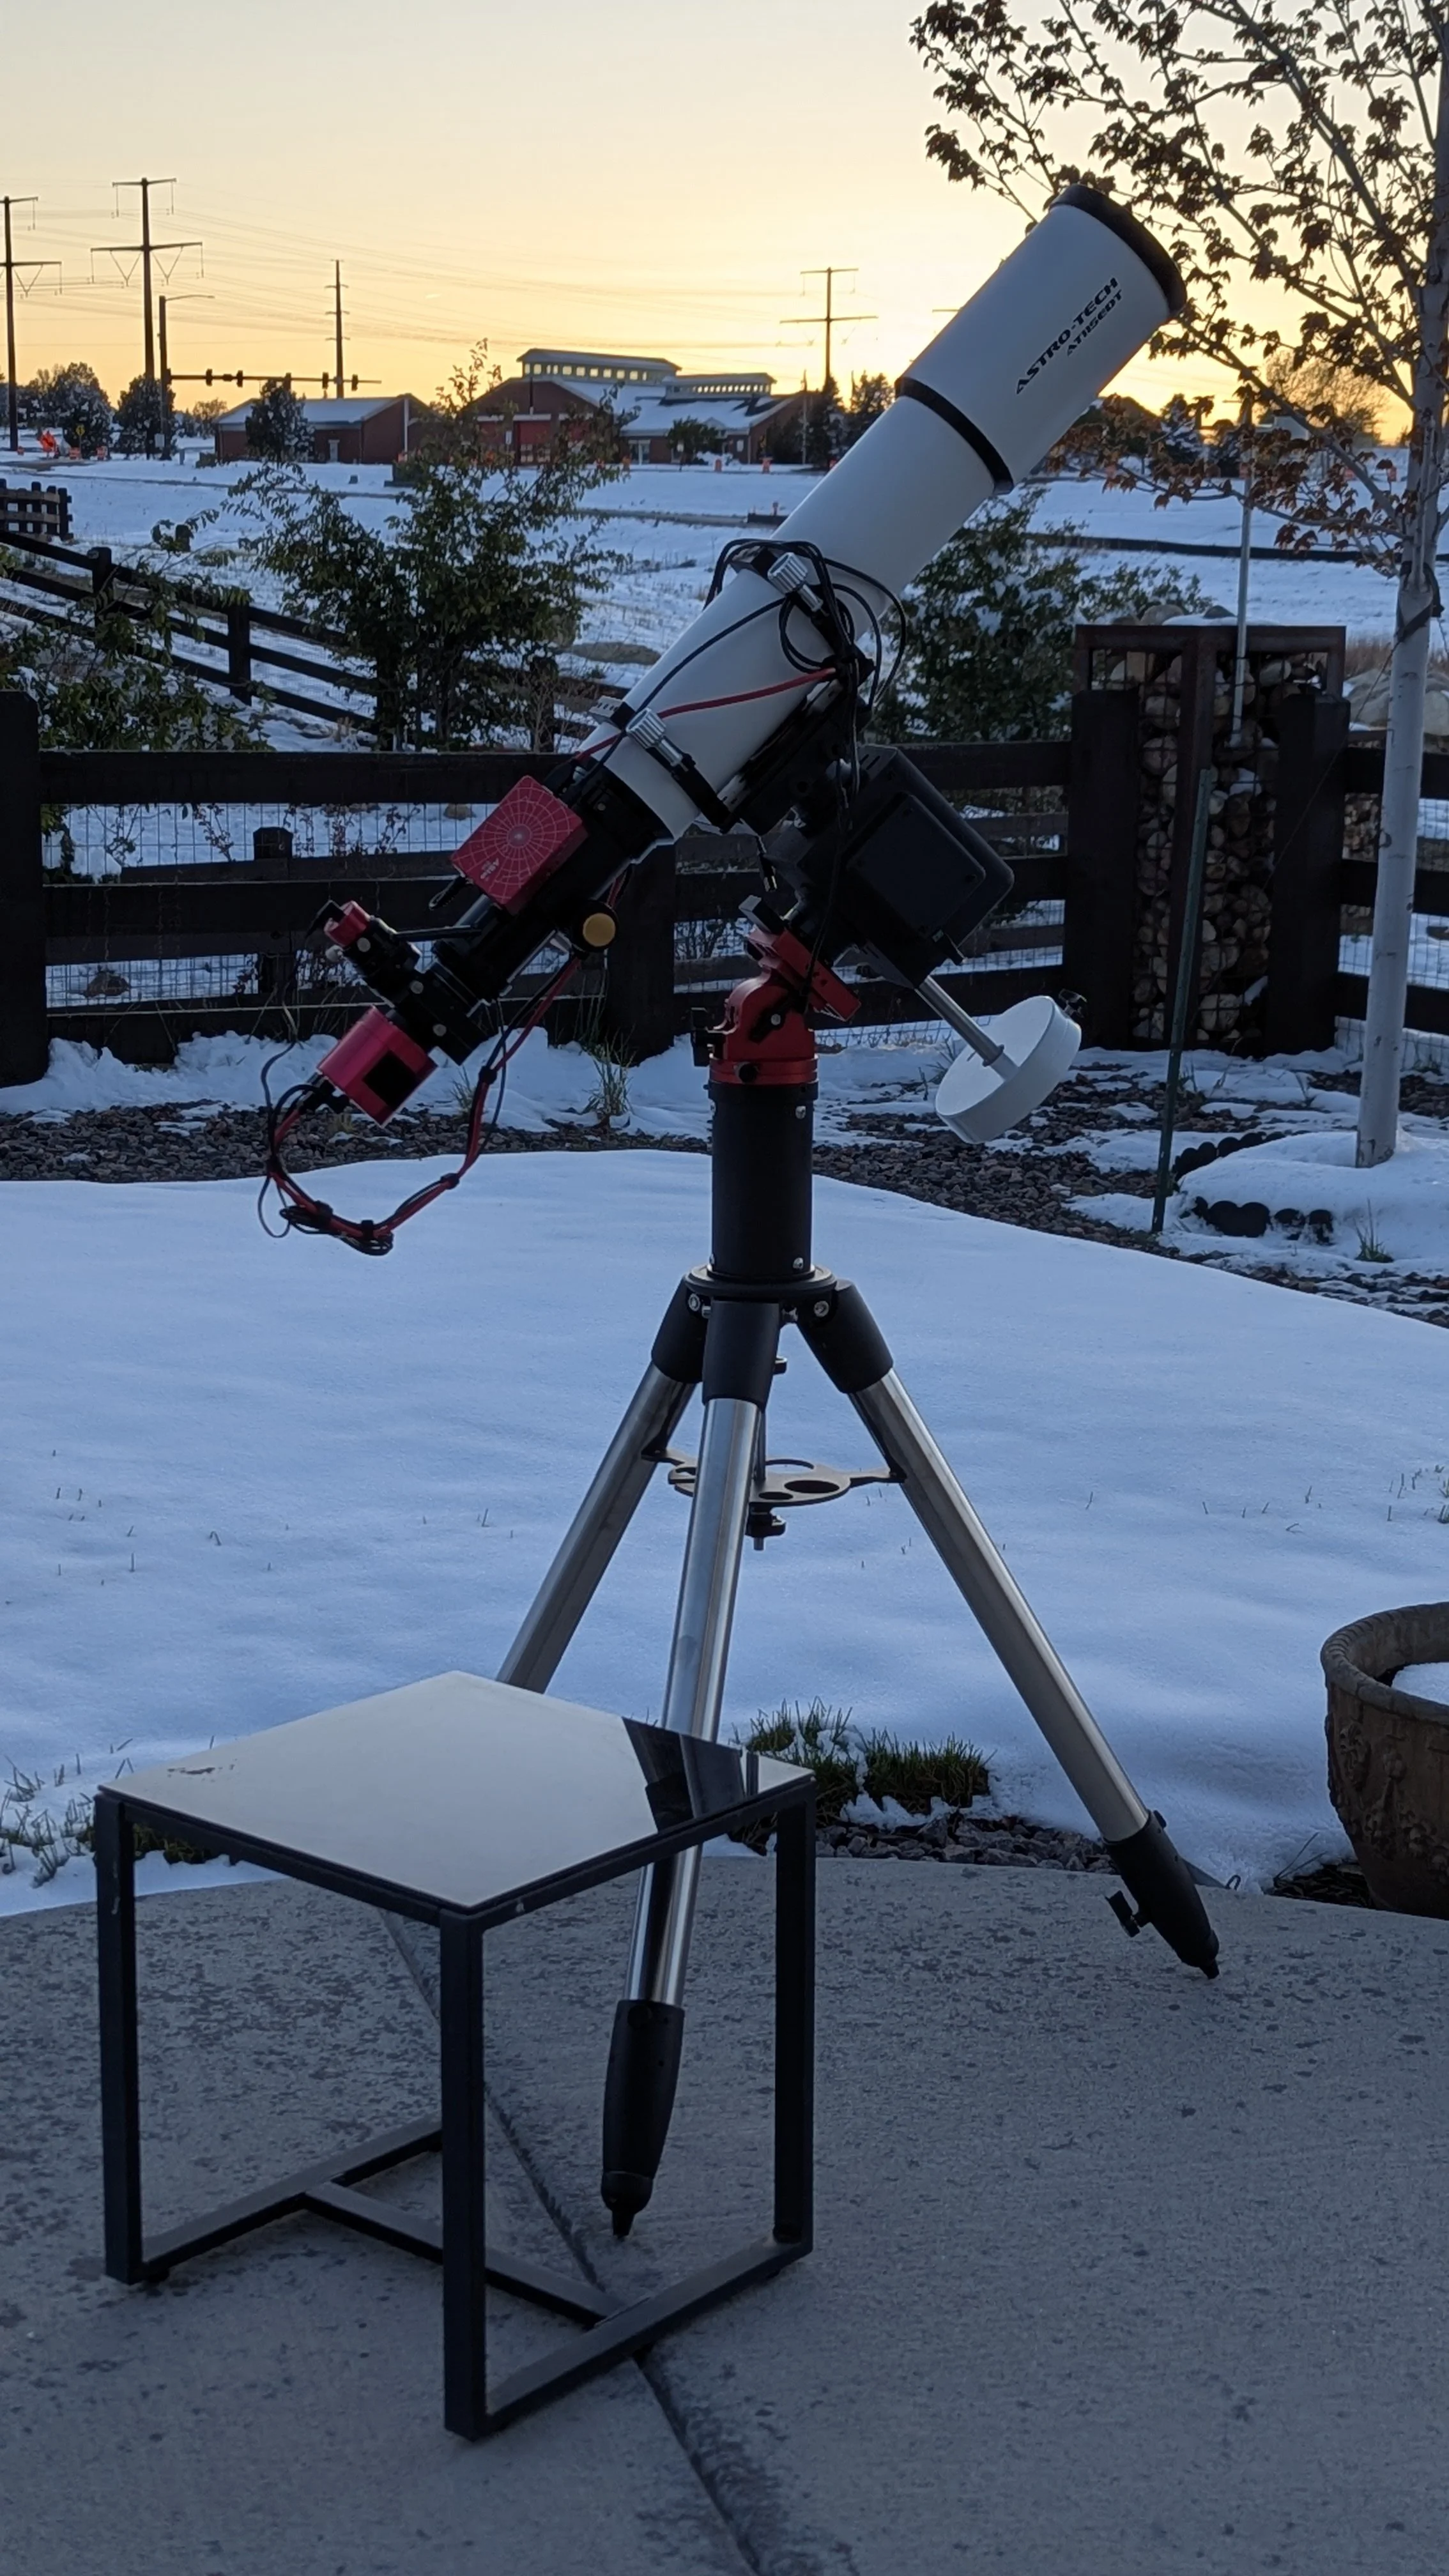
The plan was to shoot 60” OSC subs, and 180” mono subs. I chose shorter OSC subs to try to control star size and not blow out their cores so I could maximize color in processing. The first night was a little slow getting everything set up (I’ve lost my touch at polar alignment adjustments!) but I eventually got everything working. I woke up around 1 am to watch the meridian flip on the new mount to make sure it all was going smoothly. When I got outside, it was rather windy (consistent 10mph winds and 20 mph gusts.) I decided to bring everything inside after about 4 hours of imaging, as I figured this would be too much wind to get useable data. Surprisingly, the wind had a somewhat marginal impact on the FWHM measurements for both scopes - probably due to the larger pixel scale and wide FOV. It was approximately a 10-20% increase in FWHM for the C6, and a 20-30% increase for the Redcat. It seems like a larger change, but again, the larger pixel scale hides it well. After that experience and measurement, I feel a bit more comfortable that I will still get usable data when it’s a little breezy (though I still don’t want to image in gusts greater than 20mph since my gear is exposed to the wind). That said, I still got rid of some of the outlier FWHM measurements, and I needed to toss a good amount due to the subs being a little washed out due to some new LED street lights that came into play toward the end of the session. Plus, I had more imaging time planned anyway, so I felt I could be selective. Another fun fact - I looked at my weather station data in the morning and saw that the wind became calm about 30 minutes after I packed everything up. Win some lose some I guess!
The second night went perfectly - same plan: 60” OSC subs and 180” mono subs. I gathered 7hrs of Ha, and 7hrs of OSC data and kept almost every sub. I still woke up to monitor the meridian flip since I didn’t get to the first night. Everything worked perfectly. The next morning, I decided to take some flat and bias frames and practice processing some of the data, but I wasn’t going to be ready for full processing until I had Oiii data, which I planned to capture on night 3.
The third night was hit and miss. It was a bit breezy again at the beginning of the night, and the forecast called for calming winds by midnight, so I decided to give it a go. This time, I wanted to capture some 180” OSC subs to compare/combine with the 60” OSC subs, alongside some 180” Oiii subs. The Oiii subs were a hit - the C6 and Eq6r-Pro performed well, and I only tossed some subs due to the new light pollution nearby. The Redcat on the DIY mount was a different story: at the beginning of the night, I noticed the declination axis of the mount just wasn’t tracking. I sent it back to its home position and re-tried the imaging plan and it worked great. I decided to just sleep since I was comfortable with the meridian flip. I came down that morning and saw the Redcat was not parked in it's home position like usual, and instead was tilted on the declination axis. Based on its position, I concluded that it happened after the meridian flip at some point. I was not able to return the mount to its home position, even after restarting the mount, so I’m going to open the mount up tonight and see if I can figure out what happened. I only got about 90 180” minute OSC subframes out of the night, however, I had plenty of OSC data, so I decided to process it all.
Processing was a bit of re-learning, especially since I hadn’t done much continuum subtraction before (I did on my M33), and there’s been lots of new techniques and tools that have come out this year. However, my general process was the same: Blink and Subframe Selector in Pixinsight to remove any outlier frames. Stacking in Siril. Back to Pixinsight for Spectrophotometric Flux Calibration > Multiscale Gradient Correction > Background Neutralization > Spectrophotometric Color Calibration (at this stage, I found SPCC gave the OSC images a magenta cast for some reason. I ran Background Neutralization again, which helped, but it require lots of manual curves adjustments later.) Next was BlurX and Starnet to produce star masks and starless images for the 60” and 180” OSC stacks, and starless Oiii and Ha images. I then ran Photometric Continuum Subtraction for the Ha and Oiii images against the Red and Blue channels respectively, of the 180” RGB image. I then ran Statistical stretch and NoiseX on the OSC images and blended them. I also ran Statistical Stretch on the Continuum Subtracted Ha and Oiii images, and then ran NoiseX on those as well. I made some curves adjustments to the Ha and Oiii data to zero out the background and increase the highlights. I then spent ages working on the OSC data, trying to remove the magenta cast. Lots of masking, and little saturation, hue, chrominance, and RGB/k curves adjustments until I felt like it was in a better spot. I ran a masked HDR Multiscale Transform to recover some of the galaxy’s core. I ran an Unsharp Mask to recover a little more detail on the RGB image. I then used the CombineRGBandNarrowband script to combine the images. Finally, I ran the Star Stretch script and compared the 180” and 60” star masks. The 60” star mask did not produce as many faint stars as the 180” star mask, and the cores of the brighter stars all looked similar to me, so I opted to use the 180” star mask for the image. Before combining them, I ran Convolution to soften some of the smaller, blocky stars a little bit. I combined the star mask and the RGB/Narrowband image and this is the result! Enjoy!
September 25, 2024

All-new data under somewhat moon-lit skies, but new processing tools help even average data shine! I really like how much the nebulosity stands out in this image compared to previous versions. The Tri-Band filter really helps. I may revisit this in the future with a dual-narrowband filter and perform continuum subtraction to really help those areas of nebulosity pop! Additionally, this is the last target for my RedCat 51 telescope, at least for awhile. I recently received the Orion Optics Ideal 8 Newtonian telescope that I ordered in June, so I’ll really be focused on that and all the new targets it will enable me to capture!
Technical Details
Imaging Telescope: William Optics RedCat 51 II
Imaging Camera: ZWO ASI533MC Pro
Mount: Sky-Watcher EQ6-R Pro
Filter: Antlia Tri-band RGB Ultra Filter - 2” Mounted
Accessories: ZWO ASIAIR Plus, ZWO EAF
Software: PixInsight, Photoshop, NoiseXterminator, Starnet, BlurXterminator
Guiding Telescope: William Optics UniGuide 32
Guiding Camera: ZWO ASI174MM
Imaging Dates: Sep. 7/18/19, 2024
Frames (gain 101.0) f/4.9 -10c: 140x180” (7h)
Integration Time: 7h
Darks/Flats/Dark Flats: 30/25/30
Bortle Dark-Sky Scale: 5.00
December 29, 2023
Reprocessed the previous data with my new processing method and added 3 hours of 3 minute subframes. As usual, it does a much better job managing stars, color balance, and saturation! Now up to 11 hours of integration time.
Technical Details
Imaging Telescope: William Optics RedCat 51 II
Imaging Camera: ZWO ASI533MC Pro
Mount: Sky-Watcher EQ6-R Pro
Filter: SVBony UV/IR Cut 2”
Accessories: ZWO ASIAIR Plus, ZWO EAFZWO ASAIR Plus
Software: Siril, Photoshop, NoiseXterminator, Starnet
Guiding Telescope: William Optics UniGuide 32
Guiding Camera: ZWO ASI174MM
Imaging Dates: Nov. 7, 2023, Nov. 9, 2023, Nov. 14, 2023, Nov. 16, 2023
Frames (gain 101.0) f/4.9 -10c: 159x180” (7h57m) 40×120″(1h20m), 30x60”(30m), 148×30″(1h14m)
Integration Time: 11h1m
Darks/Flats/Dark Flats: 30/30/30
Bortle Dark-Sky Scale: 4.00
November 17, 2023

Added almost 6 more hours of exposure time to Andromeda. The exposure time really helps to bring out the fainter details in the outer dust lanes. The core is much less blown out in this image, which I’m happier with. As you can tell, there’s not a huge difference between this and the previous image, so at a certain point, you need to decide when enough exposure time is enough. When I upgrade to a monochrome dedicated astronomy camera with filter wheel, I will revisit this target. Monochrome cameras are essentially 4x as sensitive since each pixel is collecting only one color channel at a time, so I should be able to capture much more detail in the dust lanes.
Technical Details
Imaging Telescope: William Optics RedCat 51 II
Imaging Camera: ZWO ASI533MC Pro
Mount: Sky-Watcher EQ6-R Pro
Filter: SVBony UV/IR Cut 2”
Accessories: ZWO ASIAIR Plus, ZWO EAFZWO ASAIR Plus
Software: DSS, Siril, Photoshop, NoiseXterminator, StarXterminator, Astronomy Tools Actions Set
Guiding Telescope: William Optics UniGuide 32
Guiding Camera: ZWO ASI174MM
Imaging Dates: Nov. 7, 2023, Nov. 9, 2023, Nov. 14, 2023, Nov. 16, 2023
Frames (gain 101.0) f/4.9 -10c: 99x180” (4h57m) 40×120″(1h20m), 30x60”(30m), 148×30″(1h14m)
Integration Time: 8h1m
Darks/Flats/Dark Flats: 30/30/30
Bortle Dark-Sky Scale: 4.00
November 12, 2023

My first image of Andromeda with the new camera. The core is still a bit blown out, so I think more short exposures are key here. Otherwise, the color balance looks correct and once again, so much more detail than I am able to capture with the mirrorless camera.
Technical Details
Imaging Telescope: William Optics RedCat 51 II
Imaging Camera: ZWO ASI533MC Pro
Mount: Sky-Watcher EQ6-R Pro
Filter: SVBony UV/IR Cut 2”
Accessories: ZWO ASIAIR Plus, ZWO EAFZWO ASAIR Plus
Software: DSS, Siril, Photoshop, NoiseXterminator, StarXterminator, Astronomy Tools Actions Set
Guiding Telescope: William Optics UniGuide 32
Guiding Camera: ZWO ASI174MM
Imaging Dates: Nov. 7, 2023, Nov. 9, 2023
Frames (gain 101.0) f/4.9 -10c: 40×120″(1h20m), 60×30″(30m), 30x60”(30m)
Integration Time: 2h20m
Darks/Flats/Dark Flats: 30/30/30
Bortle Dark-Sky Scale: 4.00
November 6, 2023

I added another hour and a half or so of integration time to Andromeda. I wanted a bit more color and contrast in the image, so I tried some new processing techniques. Unfortunately, I think I blew out the core a little bit and there seems to be a good amount of noise in the color data, but I do prefer the look of the dust lanes on the outer part of the galaxy. I’ll need to keep revisiting this to see if I can get a better result through better processing. At this point, I should have enough amount of data for a good image.
Technical Details
Imaging Telescope: William Optics RedCat 51 II
Imaging Camera: Canon EOS R
Mount: Sky-Watcher EQ6-R Pro
Filter: None
Accessories: ZWO ASIAIR Plus, ZWO EAF
Software: Photoshop, StarNet, Astronomy Tools Actions Set, ZWO ASIAIR+
Guiding Telescope: William Optics UniGuide 32
Guiding Camera: ZWO ASI174MM
Imaging Dates: Oct. 16, 2023, Oct. 17, 2023, Nov. 3, 2023
Frames (ISO 1600) f/4.9: 45×150″(1h52m), 42×180″(2h6m), 66x90”(1h39m)
Integration Time: 5h37m
Darks: 15/15/19
Bortle Dark-Sky Scale: 4.00
November 3, 2023

I added another 2 hours of integration time to my earlier data with some slightly longer exposures to see if I could better capture the dust in the outer part of the galaxy. I also learned some better techniques for color balancing and the results speak for themselves. There still seems to be a bit of green cast to this image, so I’ll need to keep practicing. Overall, it is quite the improvement over the previous image.
Technical Details
Imaging Telescope: William Optics RedCat 51 II
Imaging Camera: Canon EOS R
Mount: Sky-Watcher EQ6-R Pro
Filter: None
Accessories: ZWO ASIAIR Plus, ZWO EAF
Software: Photoshop, StarNet, Astronomy Tools Actions Set, ZWO ASIAIR+
Guiding Telescope: William Optics UniGuide 32
Guiding Camera: ZWO ASI174MM
Imaging Dates: Oct. 16, 2023, Oct. 17, 2023
Frames (ISO 1600) f/4.9: 45×150″(1h52m), 42×180″(2h6m)
Integration Time: 3h58m
Darks: 15/15
Bortle Dark-Sky Scale: 4.00
October 16, 2023

We all start somewhere. My first image of Andromeda. I got just shy of 2 hours of integration time on it. It’s clear that I still need some practice with processing the data, but hey, there’s still an image! The color is a bit green/blue cast, which apparently is typical with mirrorless/DSLR cameras in astrophotography. I’ll see if I can figure out how to better color balance in the future. I will probably continue to use Andromeda as a testing ground for various techniques since it is such a large, bright object, and is so commonly imaged that there is lots of reference material out there.
Technical Details
Imaging Telescope: William Optics RedCat 51 II
Imaging Camera: Canon EOS R
Mount: Sky-Watcher EQ6-R Pro
Filter: None
Accessories: ZWO ASIAIR Plus, ZWO EAF
Software: Photoshop, StarNet, Astronomy Tools Actions Set, ZWO ASIAIR+
Guiding Telescope: William Optics UniGuide 32
Guiding Camera: ZWO ASI174MM
Imaging Dates: Oct. 16, 2023
Frames (ISO 1600) f/4.9: 45×150″(1h52m)
Integration Time: 1h52m
Darks: 15
Bortle Dark-Sky Scale: 4.00